FREE SHIPPING TO USA + CANADA (YES FREE! READ THAT AGAIN!)x

Mix and Match Leftover Wraps

by Rebecca Fox September 04, 2024

Mix and Match Leftover Wraps

Image by freepik

Are you a nail art enthusiast with a drawer full of forgotten nail wraps? Or perhaps you've just discovered these fun and easy-to-use nail accessories but find yourself with more than you can use? Fear not! Your collection of nail wraps doesn't have to gather dust or end up in the trash. In this blog post, we'll explore a multitude of creative ways to repurpose your old nail wraps, transforming them from simple nail accessories into versatile craft materials for various projects.


Photo by
RDNE Stock project

Nail wraps, also known as nail stickers or nail polish strips, are thin, adhesive strips designed to give your nails an instant makeover without the need for traditional nail polish. They come in a wide array of colors, patterns, and designs, making them popular among nail art enthusiasts. However, it's common to end up with leftover wraps that don't quite fit your nails or simply have no use for!


Instead of letting these vibrant and versatile accessories go to waste, we'll dive into innovative ideas that will breathe new life into your leftover nail wraps. From organizing your collection to creating stunning fashion accessories and home decor items, you'll discover that the possibilities are nearly endless. So, let's embark on this creative journey and transform those overlooked nail wraps into beautiful, functional, and fun projects!

I. Organizing Your Nail Wrap Collection

Photo credit: Terry Susan P. on Facebook

Before we delve into the myriad of creative uses for your old nail wraps, let's start by addressing an essential aspect of nail wrap ownership: organization. A well-organized collection not only helps you keep track of what you have but also inspires creativity and ensures that you're making the most of your nail wraps, whether on your nails or in other projects.

You may check out our Keeping Your Nail Wraps Fresh and Fabulous for more storage ideas!

II. Leftover Wraps as Materials for Fashion Accessories

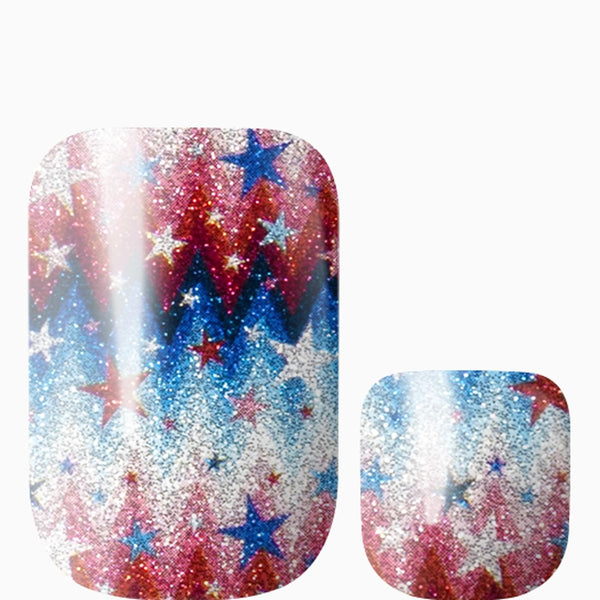
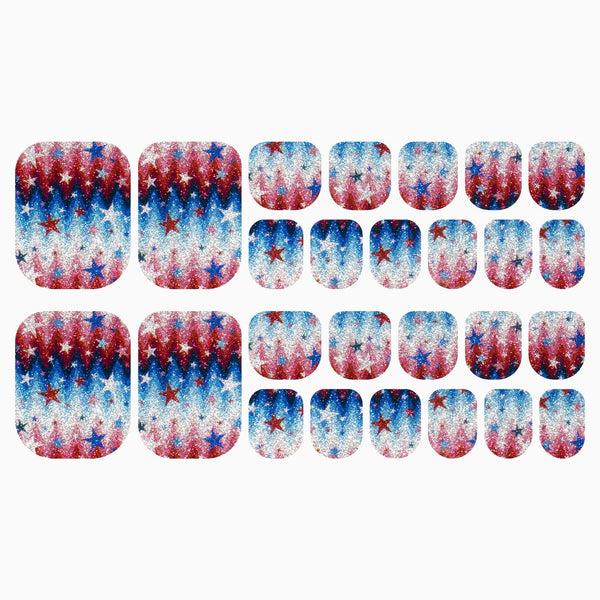
Photo credit: Ana Patricia R. on Facebook with Oh My Stars & Stripes

One of the most exciting ways to repurpose your old nail wraps is by transforming them into unique fashion accessories. The vibrant colors, intricate patterns, and durable nature of nail wraps make them perfect for creating eye-catching jewelry and other wearable items. Let's explore some creative ideas to turn your leftover nail wraps into stunning fashion statements.

Earrings


Nail wraps can be used to create beautiful, lightweight earrings that are sure to turn heads. Here are a few ideas to get you started:

1. Stud Earrings:
    • - Cut small circles or shapes from your nail wraps.
    • - Adhere these to flat earring studs using strong craft glue.
    • - Apply a thin layer of clear nail polish or resin over the top for added durability.

    Photo credit:Michelle S. on Facebook

    2. Dangle Earrings:
      • - Cut larger shapes from your nail wraps, such as teardrops or geometric forms.
      • - Glue these into thin wooden or acrylic shapes of the same size.
      • - Attach earring hooks to create unique dangle earrings.

      Photo credit: Jamie H. on Facebook

      Photo credit: Jamie H. on Facebook

      Photo credit: Jess B. on Facebook
      Get notified when  Let’s Do The Time Warp Again is back in stock—send us an email right away! 

      3. Hoop Accent Earrings:
        • - Cut thin strips of nail wraps.
        • - Carefully wrap these around plain hoop earrings, securing with clear nail polish or craft glue.
        • - This technique adds a pop of color or pattern to simple hoops.

        Photo credit: Jamie H. on Facebook

        Photo credit: Brenda B. on Facebook with Caught in a Web of Dreams

        Bracelets


          Image by
          freepik
           

          Nail wraps can be incorporated into various bracelet designs, adding a unique touch to your arm candy.

          Photo credit: Cyndi C. on Facebook
          Get notified when Blue Diamondback (Glitter) is back in stock—send us an email right away!

          1. Bangle Bracelets:
            • - Choose a plain wooden or plastic bangle.
            • - Measure and cut nail wraps to fit the bangle's circumference.
            • - Carefully apply the wraps to the bangle, smoothing out any bubbles.
            • - Seal with clear nail polish or resin for longevity.
            2. Charm Bracelet Accents:
              • - Cut small shapes from nail wraps.
              • - Adhere these to flat charm bracelet pendants.
              • - Add to your existing charm bracelet for a personalized touch.
              3. Wrap Bracelet:
                • - Cut long, thin strips of nail wraps.
                • - Braid these strips together with thin cords or ribbons.
                • - Attach clasps to the ends to create a wraparound bracelet.
                Phone Case Decoration

                  Give your phone a makeover using leftover nail wraps. This is a great way to customize your device and make it stand out.


                  Image by
                  freepik
                   

                  1. Full Coverage:
                    • - Clean your phone case thoroughly.
                    • - Cut nail wraps to fit the shape of your case, leaving small margins around edges and openings.
                    • - Carefully apply the wraps, smoothing out any bubbles.
                    • - Trim excess material and seal with clear nail polish or a thin layer of resin.
                    2. Accent Designs:
                      • - Cut small shapes or strips from nail wraps.
                      • - Arrange these on your phone case in a pattern or design of your choice.
                      • - Seal with clear nail polish or resin to ensure they stay in place.
                      3. Layered Look:
                        • - Apply a base layer of a solid color nail wrap to your phone case.
                        • - Cut out designs from contrasting nail wraps and layer these on top of the base.
                        • - This technique creates depth and allows for more intricate designs.
                        Hair Accessories


                          Image by
                          freepik

                          Transform plain hair accessories into stylish statement pieces using nail wraps. 

                          1. Decorated Bobby Pins:
                            • - Cut small shapes from nail wraps.
                            • - Adhere these to the flat end of bobby pins.
                            • - Seal with clear nail polish for a lasting finish.
                            2. Customized Hair Clips:
                              • - Choose plain, flat hair clips or barrettes.
                              • - Cut nail wraps to fit the visible surface of the clip.
                              • - Apply the wraps carefully, trimming any excess.
                              • - Seal with clear nail polish or resin for durability. 
                              3. Headband Makeover:
                                • - Select a plain plastic or fabric headband.
                                • - Cut strips of nail wraps to fit the width of the headband.
                                • - Carefully apply the wraps, smoothing as you go.
                                • - For fabric headbands, you may need to use fabric glue for better adhesion.

                                By repurposing your old nail wraps into fashion accessories, you're not only giving these materials a second life but also creating unique, personalized items that reflect your style. These DIY accessories make great gifts and can even become the start of a small crafting business if you find you have a knack for creating them!

                                III. Nail Wraps in Home Decor


                                Image by freepik 

                                Who says nail wraps are just for beauty and fashion? With a little creativity, these versatile accessories can add a pop of color and personality to your home decor. Let's explore some innovative ways to incorporate nail wraps into your living space.

                                A. Custom Wall Art

                                  Transform your walls with unique art pieces created using nail wraps. These projects are perfect for adding a personal touch to your home or creating affordable, customizable decor. 

                                  1. Framed Nail Wrap Collage:
                                    • - Choose a selection of complementary nail wraps.
                                    • - Cut them into various shapes or leave them as rectangles.
                                    • - Arrange the pieces on a piece of cardstock or canvas in an pleasing pattern.
                                    • - Frame your creation for a polished look.
                                    2. Geometric Wall Decal Alternative:
                                      • - Use nail wraps as an alternative to expensive wall decals.
                                      • - Cut geometric shapes from your nail wraps.
                                      • - Arrange these on your wall in a pattern, such as a starburst or cascading design.
                                      • - This is especially great for rental properties as the nail wraps can be easily removed without damaging the walls.
                                      3. Faux Tile Backsplash:
                                        • - Choose nail wraps with patterns that resemble tile designs.
                                        • - Cut them into square or hexagonal shapes.
                                        • - Apply these to a kitchen or bathroom wall in a grid pattern to create the illusion of a tiled backsplash.
                                        • - Seal with a clear, water-resistant sealant for durability in high-moisture areas. 
                                        B. Decorating Small Objects

                                          Small decorative objects around your home can get a fresh, personalized look with the application of nail wraps.

                                          1. Vase Makeover:

                                            • - Clean a plain glass or ceramic vase thoroughly.
                                            • - Cut nail wraps into strips or shapes that complement the vase's form.
                                            • - Apply the wraps to the vase, smoothing out any bubbles.
                                            • - For added protection, especially for frequently used vases, seal with a clear, water-resistant sealant. 
                                            2. Picture Frame Accents:
                                              • - Choose plain wooden or plastic picture frames.
                                              • - Cut nail wraps to fit the frame's edges or corners.
                                              • - Apply the wraps carefully, trimming any excess.
                                              • - This technique can coordinate your frames with your room's decor or add a pop of contrasting color.
                                              3. Candle Holder Decoration:
                                                • - Select plain glass candle holders or jars.
                                                • - Cut nail wraps into shapes that fit the container's surface.
                                                • - Apply the wraps to the outside of the holder.
                                                • - When the candle is lit, it will create a beautiful, patterned glow through the nail wrap design.
                                                C. Creating Unique Coasters

                                                  Protect your surfaces in style with DIY nail wrap coasters. This project is both functional and decorative, and it's a great way to use up larger pieces of leftover nail wraps.

                                                  1. Tile Coasters:

                                                    • - Purchase plain ceramic tiles from a home improvement store.
                                                    • - Cut nail wraps to fit the top surface of the tiles.
                                                    • - Apply the wraps carefully, smoothing out any bubbles.
                                                    • - Seal with several layers of clear, heat-resistant sealant.
                                                    • - Optionally, add felt pads to the bottom of the tiles to protect surfaces.

                                                    2. Wood Slice Coasters:

                                                      • - Find or purchase thin wood slices.
                                                      • - Sand the surface smooth if necessary.
                                                      • - Apply nail wraps to the top surface, trimming the edges neatly.
                                                      • - Seal with a clear, water-resistant wood sealant.
                                                      • - This creates a beautiful blend of natural and colorful elements.

                                                      3. Resin Coasters:

                                                        • - Cut nail wraps into small shapes or strips.
                                                        • - Arrange these in silicone coaster molds.
                                                        • - Pour clear resin over the nail wrap pieces, following the resin manufacturer's instructions.
                                                        • - Once cured, pop out your unique, embedded nail wrap coasters. 

                                                        By incorporating nail wraps into your home decor, you're not only finding a use for your leftover materials but also creating custom pieces that perfectly match your style and color scheme. These projects allow you to refresh your living space without breaking the bank, and they're sure to be conversation starters when you have guests over!

                                                        IV. Nail Wraps in Crafting Projects

                                                          The versatility of nail wraps extends far beyond fashion and home decor. These colorful and patterned adhesives can be excellent materials for various crafting projects. Whether you're an avid scrapbooker, a greeting card maker, or someone who loves to add a personal touch to gifts, nail wraps can be your secret crafting weapon. Let's explore some creative ways to incorporate nail wraps into your crafting endeavors.

                                                          1. Scrapbooking Embellishments

                                                            Scrapbooking is all about preserving memories in a creative and personal way. Nail wraps can add unique textures and designs to your scrapbook pages, making them even more special.

                                                            a. Custom Die-Cuts:

                                                              • - Use craft punches or die-cutting machines to create shapes from nail wraps.
                                                              • - These can include flowers, hearts, stars, or any shape that complements your scrapbook theme.
                                                              • - Layer these die-cuts with paper elements for added dimension.

                                                              b. Border Strips:

                                                                • - Cut nail wraps into thin strips.
                                                                • - Use these as decorative borders along the edges of your scrapbook pages or photo mats.
                                                                • - Mix and match patterns for an eclectic look.

                                                                c. Lettering and Titles:

                                                                • - Use letter-shaped craft punches to cut out titles or important words from nail wraps.
                                                                • - These can be used as headlines for your scrapbook pages or to highlight key phrases in your journaling.

                                                                d. Texture Panels:

                                                                • - Cut larger pieces of nail wraps to use as textured backgrounds or accent panels on your scrapbook pages.
                                                                • - Layer these with photos and other embellishments for a rich, multi-dimensional look.

                                                                2.  Greeting Card Decorations

                                                                  Handmade greeting cards become even more special when decorated with unique elements like nail wraps. Here are some ideas to incorporate them into your card-making projects:

                                                                  a. Accent Shapes:
                                                                    • - Cut small shapes from nail wraps to use as accents on your cards.
                                                                    • - These can be hearts for Valentine's Day cards, stars for congratulations cards, or flowers for general purpose cards.

                                                                    b. Decorative Backgrounds:

                                                                      • - Use larger pieces of nail wraps as decorative backgrounds for your card fronts.
                                                                      • - Cut the wrap slightly smaller than your card front and adhere it before adding other elements.

                                                                      c.  Faux Washi Tape:

                                                                        • - Cut nail wraps into thin strips to mimic the look of washi tape.
                                                                        • - Use these strips to create borders, flags, or decorative elements on your cards.

                                                                        d. 3D Elements:

                                                                          • - Create 3 flowers or bows using nail wraps.
                                                                          • - Cut petal or ribbon shapes from the wraps and layer them to create dimensional embellishments for your cards.

                                                                          3. Gift Wrapping Accents

                                                                            Elevate your gift-wrapping game by incorporating nail wraps into your designs. These small additions can make a big impact on the overall presentation of your gifts.

                                                                            a. Custom Gift Tags:

                                                                              • - Cut gift tag shapes from cardstock.
                                                                              • - Decorate these with pieces of nail wrap for a unique, colorful look.
                                                                              • - Write your message on the back or on a small label attached to the front.

                                                                              b. Ribbon Alternative:

                                                                                • - Cut long strips of nail wrap to use in place of ribbon.
                                                                                • - These can be wrapped around gifts or used to create bows.
                                                                                • - This is especially useful for oddly shaped gifts that are difficult to tie with traditional ribbons.

                                                                                c. Accent Designs:

                                                                                  • - Cut small shapes or strips from nail wraps.
                                                                                  • - Use these to create patterns or designs on plain wrapping paper.
                                                                                  • - This allows you to customize your gift wrap to match any occasion or recipient's taste.

                                                                                  d. Gift Box Decoration:

                                                                                    • - Use nail wraps to add decorative elements to plain gift boxes.
                                                                                    • - Cover the entire lid with a nail wrap for a bold look, or add strips around the edges for a more subtle effect.

                                                                                    e. Envelope Seals:

                                                                                      • - Cut small circles from nail wraps.
                                                                                      • - Use these as seals for envelopes or to secure the flaps of gift bags.
                                                                                      • - This adds a touch of elegance and ensures your gift stays closed until it's time to open.

                                                                                      By incorporating nail wraps into your crafting projects, you're not only finding creative uses for these versatile materials but also adding unique, personalized touches to your creations. Whether you're preserving memories in a scrapbook, sending heartfelt greetings through cards, or presenting gifts with extra flair, nail wraps can help you achieve a one-of-a-kind look that's sure to be appreciated.

                                                                                      V. Upcycling Nail Wraps for Beauty Purposes

                                                                                        While nail wraps are primarily designed for nail decoration, their versatility extends to other areas of beauty and personal expression. By thinking outside the box, you can repurpose your old nail wraps for various beauty applications, creating unique looks that are sure to turn heads. Let's explore some innovative ways to use nail wraps in your beauty routine beyond your nails.

                                                                                        A. Custom Temporary Tattoos

                                                                                          Transform your nail wraps into unique, temporary tattoos for a fun and commitment-free way to accessorize your skin.

                                                                                          1. Creating the Tattoo:

                                                                                            • - Cut your desired design from the nail wrap. Small, intricate designs work best for this purpose.
                                                                                            • - Clean the area of skin where you want to apply the tattoo with rubbing alcohol.
                                                                                            • - Remove the clear protective layer from the nail wrap.
                                                                                            • - Place the design face-down on your skin.
                                                                                            • - Hold a damp cloth over the back of the nail wrap for about 30 seconds.
                                                                                            • - Carefully peel off the backing, leaving the design on your skin.

                                                                                            2. Placement Ideas:

                                                                                              • - Wrist: Create a delicate bracelet effect with a string of small designs.
                                                                                              • - Ankle: Apply a single statement piece or a series of smaller designs.
                                                                                              • - Behind the ear: A trendy spot for small, subtle designs.
                                                                                              • - Collarbone: An elegant location for longer, more intricate patterns.

                                                                                               3. Longevity and Care:

                                                                                                • - These DIY tattoos can last 1-3 days, depending on placement and care.
                                                                                                • - Avoid scrubbing the area when bathing.
                                                                                                • - Apply a small amount of baby powder over the tattoo to help it last longer.

                                                                                                B. Eyeliner Designs

                                                                                                  For those who love to experiment with eye makeup, nail wraps can be used to create unique eyeliner looks.

                                                                                                  1. Preparation:

                                                                                                    • - Cut very thin strips or small shapes from your nail wraps.
                                                                                                    • - Ensure your eyelids are clean and oil-free for better adherence.

                                                                                                    2. Application Techniques:

                                                                                                      • - Winged Liner: Use a thin strip of nail wrap to create a perfect wing at the outer corner of your eye.
                                                                                                      • - Accent Pieces: Apply small shapes like stars or hearts at the outer corner of your eyes for a playful look.
                                                                                                      • - Double Liner: Layer a colorful strip of nail wrap over your regular eyeliner for a two-toned effect.

                                                                                                      3. Tips for Success:

                                                                                                        • - Use tweezers for precise application.
                                                                                                        • - If needed, secure the edges with a tiny amount of eyelash glue.
                                                                                                        • - Remove gently with oil-based makeup remover at the end of the day.
                                                                                                        C. Accent Pieces for Face Painting


                                                                                                          Photo by Lucas Pezeta

                                                                                                          Nail wraps can add an extra dimension to face painting, whether for Halloween, festivals, or children's parties.

                                                                                                          1. Enhancing Face Paint Designs:

                                                                                                            • - Use nail wraps to add intricate patterns or metallic accents to face paint designs.
                                                                                                            • - For example, add scale-like texture to a mermaid design or circuit board details to a robot face paint.

                                                                                                            2. Creating Masks:

                                                                                                              • - Cut eye shapes from nail wraps to create instant masquerade-style masks.
                                                                                                              • - Layer different colors and patterns for a more complex look.

                                                                                                              3. Festival Makeup:

                                                                                                                • - Use small pieces of nail wraps to create jewel-like accents around the eyes or on the cheekbones.
                                                                                                                • - Apply long strips along the hairline for a crown-like effect.

                                                                                                                4. Application Tips:

                                                                                                                  • - For better adherence to the skin, you may need to use a small amount of spirit gum or other skin-safe adhesive.
                                                                                                                  • - Always do a patch test first to ensure no skin irritation.

                                                                                                                  By repurposing nail wraps for these beauty applications, you're not only finding new uses for your leftover materials but also expanding your creative horizons in personal styling. These techniques allow for unique, customizable looks that can be changed as often as you like, giving you the freedom to express yourself in new and exciting ways.

                                                                                                                  VI. Using Nail Wraps in Office and School Supplies


                                                                                                                    Image by freepik

                                                                                                                    The vibrant patterns and durability of nail wraps make them perfect for adding a personal touch to your office and school supplies. By incorporating nail wraps into these everyday items, you can create a cohesive, stylish look for your workspace or study area. Let's explore some creative ways to use nail wraps to spruce up your supplies.

                                                                                                                    A. Decorating Notebooks and Planners


                                                                                                                      Image by freepik

                                                                                                                      Transform plain notebooks and planners into personalized accessories that reflect your style and personality.

                                                                                                                      1. Cover Decoration:

                                                                                                                        • - Measure and cut nail wraps to fit the cover of your notebook or planner.
                                                                                                                        • - For full coverage, apply the wrap carefully, smoothing out any bubbles.
                                                                                                                        • - For a more subtle look, cut shapes or strips to create a border or central design.
                                                                                                                        • - Seal the edges with clear nail polish to prevent peeling.

                                                                                                                        2. Tab Creation:

                                                                                                                          • - Cut small rectangles from nail wraps.
                                                                                                                          • - Fold these over the edges of important pages to create colorful, durable tabs.
                                                                                                                          • - Use different patterns for different sections of your planner or notebook.

                                                                                                                          3. Bookmark Design:

                                                                                                                            •    - Cut a strip of cardstock to your desired bookmark size.
                                                                                                                            •    - Cover it with a nail wrap for a water-resistant, decorative bookmark.
                                                                                                                            •    - Punch a hole at the top and add a tassel or ribbon for extra flair.

                                                                                                                            4. Page Accents:

                                                                                                                              • - Cut small shapes from nail wraps to use as bullet points or decorative elements on your planner pages.
                                                                                                                              • - Create stickers by backing the nail wrap pieces with double-sided tape.

                                                                                                                              B. Customizing Pens and Pencils

                                                                                                                                Give your writing utensils a makeover with nail wraps, making them easy to identify and adding a pop of color to your desk.

                                                                                                                                1. Pen Barrel Wraps:

                                                                                                                                  • - Measure the circumference and length of your pen barrel.
                                                                                                                                  • - Cut a nail wrap to size and carefully apply it to the barrel.
                                                                                                                                  • - For added durability, seal with a layer of clear nail polish.

                                                                                                                                  2. Pencil Decoration:

                                                                                                                                    • - Cut thin strips of nail wraps.
                                                                                                                                    • - Wrap these around wooden pencils in a spiral pattern.
                                                                                                                                    • - This not only decorates the pencil but can also provide a better grip.

                                                                                                                                    3. Eraser Top Accents:

                                                                                                                                      • - Cut small circles from nail wraps.
                                                                                                                                      • - Apply these to the top of pen or pencil erasers for a colorful accent.

                                                                                                                                      4. Customized Sets:

                                                                                                                                        • - Use coordinating nail wrap patterns to create matched sets of pens and pencils.
                                                                                                                                        • - This is great for gift-giving or creating a cohesive look for your desk accessories.

                                                                                                                                        C. Creating Unique Bookmarks


                                                                                                                                          Image by freepik

                                                                                                                                          Bookmarks are not only useful but can also be a form of self-expression. Create custom bookmarks using nail wraps for yourself or as thoughtful gifts for book-loving friends.

                                                                                                                                          1. Laminated Nail Wrap Bookmarks:

                                                                                                                                            • - Cut a strip of cardstock to your desired bookmark size.
                                                                                                                                            • - Cover it entirely with a nail wrap design.
                                                                                                                                            • - Laminate the bookmark for durability.
                                                                                                                                            • - Punch a hole at the top and add a tassel or ribbon.

                                                                                                                                            2. Corner Bookmarks:

                                                                                                                                              • - Follow online tutorials to create origami corner bookmarks.
                                                                                                                                              • - Use nail wraps instead of paper for a more durable and water-resistant result.
                                                                                                                                              • - These slip over the corner of a page, making them less likely to fall out.

                                                                                                                                              3. Magnetic Bookmarks:

                                                                                                                                                • - Cut two small rectangles from thin magnetic sheets.
                                                                                                                                                • - Cover each with a nail wrap design.
                                                                                                                                                • - These can clip over a page, holding your place securely.

                                                                                                                                                4. Multi-Page Markers:

                                                                                                                                                  • - Create several thin strips from nail wraps.
                                                                                                                                                  • - Attach these to paper clips.
                                                                                                                                                  • - Use these to mark multiple pages or sections in a book or textbook.

                                                                                                                                                  By incorporating nail wraps into your office and school supplies, you're not only finding a use for leftover materials but also creating a personalized, coordinated look for your workspace. These custom items can make mundane tasks more enjoyable and help you stay organized in style. Plus, they make great conversation starters and can even inspire creativity in your work or studies!

                                                                                                                                                  VII. Conclusion

                                                                                                                                                  As we've explored throughout this blog post, the humble nail wrap has a multitude of uses far beyond its original purpose. From organizing your collection to creating stunning fashion accessories, enhancing your home decor, adding flair to your crafts, expanding your beauty routine, and personalizing your office supplies, nail wraps prove to be a versatile and valuable craft material.

                                                                                                                                                  A. Recap of Creative Uses

                                                                                                                                                    Let's quickly recap the innovative ways we've discovered to repurpose old nail wraps:

                                                                                                                                                    1. Organizing your collection for inspiration and accessibility
                                                                                                                                                    2. Creating unique fashion accessories like earrings, bracelets, and phone case decorations
                                                                                                                                                    3. Incorporating nail wraps into home decor through wall art, object decoration, and coaster creation
                                                                                                                                                    4. Enhancing crafting projects such as scrapbooking, card making, and gift wrapping
                                                                                                                                                    5. Expanding beauty applications with temporary tattoos and creative makeup looks
                                                                                                                                                    6. Personalizing office and school supplies for a coordinated, stylish workspace

                                                                                                                                                    Each of these applications showcases the flexibility and durability of nail wraps, demonstrating that their usefulness extends far beyond their original nail art purpose.

                                                                                                                                                    B. Encouragement to Experiment and Share Ideas

                                                                                                                                                      The ideas presented in this blog post are just the beginning. The true beauty of crafting and upcycling lies in personal creativity and experimentation. We encourage you to take these ideas as a starting point and let your imagination run wild. Perhaps you'll discover a completely new use for nail wraps that we haven't even considered!

                                                                                                                                                      Don't be afraid to mix and match techniques, combine nail wraps with other craft materials, or adapt these ideas to suit your personal style and needs. The more you experiment, the more you'll realize the potential of these versatile accessories.

                                                                                                                                                      We also encourage you to share your creations and ideas with others. Join online crafting communities, post your projects on social media, or teach a friend your favorite nail wrap upcycling technique. By sharing your creativity, you not only inspire others but also contribute to a more sustainable approach to craft materials.

                                                                                                                                                      C. Environmental Benefits of Repurposing Nail Wraps

                                                                                                                                                        In closing, it's important to highlight the environmental benefits of repurposing nail wraps. By finding new uses for these items, we're reducing waste and extending the life of products that might otherwise end up in landfills. This approach aligns with the principles of upcycling and the circular economy, where we strive to maximize the use of resources and minimize waste.

                                                                                                                                                        Moreover, by repurposing nail wraps, we're often creating items that replace the need for new, possibly less environmentally friendly products. For example, creating your own hair accessories or phone case decorations reduces the demand for mass-produced items that may have a larger environmental footprint.

                                                                                                                                                        Ultimately, the creative repurposing of nail wraps is not just a fun and rewarding activity, but also a small yet significant step towards more sustainable living. It encourages us to look at all items in our lives with fresh eyes, always asking, "How else could this be used?" This mindset of creativity and conservation can extend far beyond nail wraps, inspiring a more thoughtful and sustainable approach to all our possessions.

                                                                                                                                                        So the next time you find yourself with a collection of unused nail wraps, remember: you're not looking at leftovers, you're looking at a world of creative possibilities. Happy crafting!


                                                                                                                                                        Rebecca Fox
                                                                                                                                                        Rebecca Fox

                                                                                                                                                        Author


                                                                                                                                                        Leave a comment

                                                                                                                                                        Comments will be approved before showing up.


                                                                                                                                                        Also in Blog

                                                                                                                                                        Nail Wrap SOS: Rescue Your Manicure
                                                                                                                                                        Nail Wrap SOS: Rescue Your Manicure

                                                                                                                                                        by Rebecca Fox December 14, 2024

                                                                                                                                                        The importance of maintenance cannot be overstated. Not only does it extend the life of your nail wraps, but it also keeps them looking as vibrant as the day they were applied. With just a bit of attention, you can keep your nails dazzling and ready to shine, no matter where life takes you.

                                                                                                                                                        View full article →

                                                                                                                                                        Nail Polish Wraps VS Semi-Cured Gel Strips: What's The Difference?
                                                                                                                                                        Nail Polish Wraps VS Semi-Cured Gel Strips: What's The Difference?

                                                                                                                                                        by Rebecca Fox December 12, 2024

                                                                                                                                                        Ever find yourself stuck between the ease of nail polish wraps and the durability of semi-cured gel strips? You’re not alone! With so many options in the world of at-home manicures, it can be tough to choose the best product for your lifestyle. Nail polish wraps offer a quick and easy application with no drying time, making them perfect for people on the go. On the other hand, semi-cured gel strips provide the long-lasting, chip-resistant finish of a salon gel manicure but require a little extra time and effort. While one promises convenience, the other delivers strength and shine that lasts for weeks. So how do you know which is right for you? Whether you’re after a simple weekend look or a manicure that can survive a busy schedule, we’re here to break down the pros and cons of each option. By the end of this post, you’ll have all the information you need to make the right choice for your nails. Keep reading to find your perfect match!

                                                                                                                                                        View full article →

                                                                                                                                                        Nail Wraps Took Over My Camera Roll (And I’m Not Mad About It)
                                                                                                                                                        Nail Wraps Took Over My Camera Roll (And I’m Not Mad About It)

                                                                                                                                                        by Rebecca Fox December 10, 2024

                                                                                                                                                        You thought your phone’s camera roll was just full of family photos, selfies, and vacation snaps? Think again. If you're anything like us, it’s probably brimming with one thing: screenshots of your hands. And not just any snapshots—artfully lit, perfectly posed close-ups of your freshly done nails.  

                                                                                                                                                        That’s right. We’re not ashamed to admit it—we’ve all fallen into the rabbit hole of obsessively photographing our manicures. Whether it’s to admire them, share them, or save them for nail inspiration later, the truth is undeniable: nail wraps are to blame. They’re not just a beauty trend; they’re a full-on lifestyle upgrade.  

                                                                                                                                                        View full article →

                                                                                                                                                        Go to our store for free shipping! Yes, please! or No, thanks.